WACOM TABLET DRIVER NOT FOUND - What Do
WACOM TABLET DRIVER NOT FOUND - What Do
So, you put your Windows computer to sleep for the night. You come back the next day all eager to wake it up and put it right to work on that thing you’ve been working on and ….
Oh no - you’ve seemed to have lost all pressure sensitivity and high resolution pen tracking! Well, you figure, why not go check the driver settings. Maybe it’s just groggy and needs a little morning reminder? You go to your Control Panel, click on Wacom Properties Configu—
Ah.
Now, you figure, all is lost and there’s only one thing left to do: save your work, close all your programs, and do a full system restart. What a fun time this is.
But HOLD ON! There’s another way! Try this out first before pulling the plug:
Open your Start menu (or press the Windows Key) and simply type “Services”. There will be an icon at the top of your list which appears to be two small gears with the name “Services.” Click that and look what happens next:
Scroll down the list and select “Wacom Professional Tablet Service” from the list of services and click the little “Restart” link in the column to the left. Now simply wait for the service to stop and start itself back up again!
If for some reason, clicking this little “Restart” button makes matters WORSE, the failsafe approach is the manual restart. Double click the “Wacom Professional Tablet” service and a window will pop up.
Manually stop the Wacom driver by clicking the Stop button. Wait for it to shut down, then start it back up again with the Start button once it becomes visible. Once restarted, click OK!
Test your Tablet now in Photoshop. You may have your pressure sensitivity fully restored!
IF NOT, simply close and reopen Photoshop, which will be nice and quick since it (and your work) are still loaded into recent memory. Yes, this isn’t IDEAL, but it surely beats having to close EVERYTHING and restart the whole computer. Especially if you were listening to a good tune at the time.
Now, providing you’ve done it correctly, (really now, how could you not,) you should find your Wacom’s pressure and tracking sensitivity fully restored! AND you’ll have access to the Tablet Properties config app once again!
Celebrations! For discovering such a wonderful little time saver.
:: ADDENDUM ::
As pointed out by Addleton there is a permanent fix for this issue by disabling the service called “TabletServicePen” if you’re using an Intuos/Bamboo or “Tablet PC Input Service” if you’re using a Cintiq.
Disabling this will stop this issue for good – but it will disable all Windows-related tablet functions such as flicks and handwriting, and may make some software such as SAI misbehave on certain hardware. If all you use your tablet for is Photoshop and drawing, it’s probably best you disable those services.
More Posts from Artrefforsteph and Others
If you have no idea what to draw...

its like having all the money you wanted ,but you dont know what to buy. Making this to look at when I get stuck with lame ideas. These are all suggestions from my followers:
Taking a break: No option for me but it surely can be good for other overworked peeps
Exploring new art forms: depending on your art style, surrealism would be something I’ve never tried before.
Shape game: Either sketching blindly and connecting the dots or sketching random shapes and fill them with faces or whatever comes to your mind.
Draw something you never drew before: …a good picture…
Draw a shark: How to draw a shark by Will Terrell
Read books: Let your mind to the picture first and then your hand.
Poses: Action poses - freestyle dancing - fight styles - (dancing people in general)- life drawing - online 3D model
Redoing Artwork: Either your old stuff or from your favorite artists, your way.
Reverse storyboarding: take your fav movie and sketch the the shots after every camera change.
Screencaps: study them, draw them, look at composition
Characters: Let your OC’s do extreme expressions, let them do things (driving,cleaning,running,etc)
Concepts: How people could look like on other planets. Look at Character Design
Planing an art project: A comic in my case, thinking about environments and characters etc.
Drawing upside down: ¿¿¿¿¿¿¿¿¿¿¿¿¿¿¿¿¿¿¿¿¿¿¿¿¿¿
Fanart: Illustrate your favorite book, series,Manga ,etc
Sideblog: Gathering all the references for all your needs

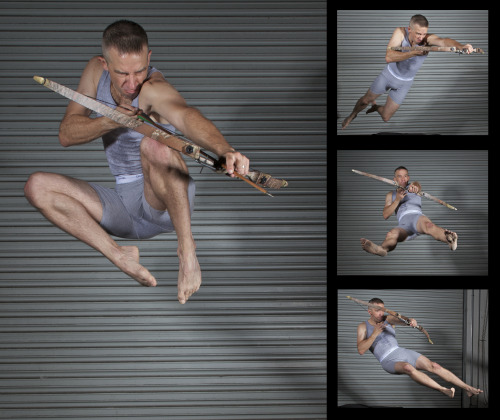
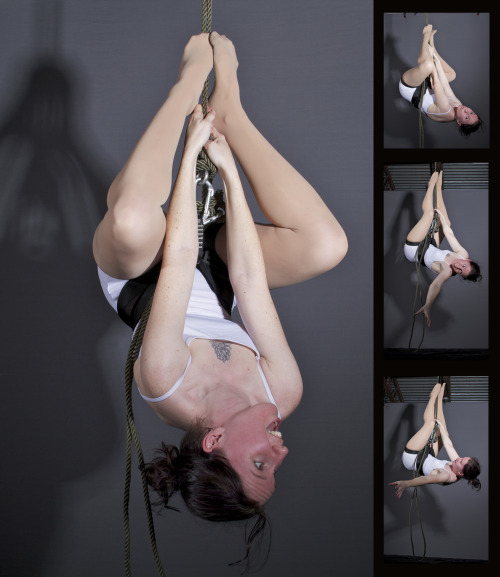


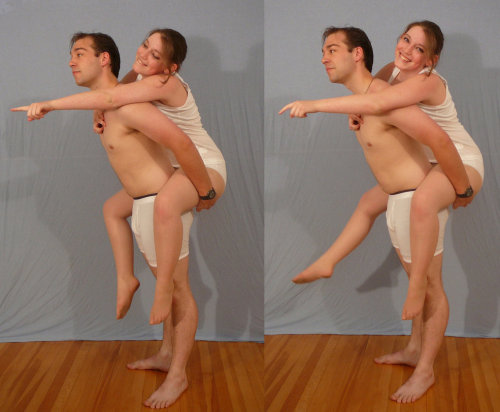
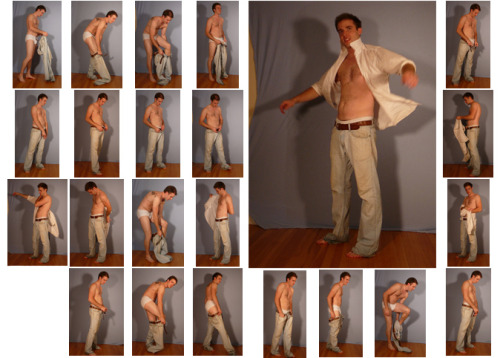
SenshiStock’s gallery consists of millions of pictures that are free to use as reference.
General Drawing Poses Sit and Kneel Dramatic and Reaching Drawing Poses Magic and Hogwarts Drawing Poses Staff Weapon Pose Reference Hammer, Axe and Bat Pose Reference Sword Weapon Drawing Reference Small Bladed Weapon Pose Reference Gun Weapon Pose Reference Bow and Arrow Archery Stock Foreshortening and Perspective Poses Dynamic Flying Falling Action Poses Deafeated or Laying Drawing Poses Magic Crystal Magical Girl Wand Weapon Transformations and Dance Cards Back Pose Reference Pin Up Inspired Poses for Drawing Performances Poses Life in General Poses Fights and Fighting Pose Reference Leaning Poses Classic Sailor Senshi Poses Wings Sailor Moon Villains Pairs Romance or Couples Pose Reference All the Male Stock Hanging Stock Drawing Reference Three or More Groups Instruments Mirrors Whip Technobabble


I got multiple people asking for help with eyes, so I threw something together quick
EDIT: ah yeah, my bad! thank you @yipyo20


sorry for any grammar mistakes
long time without a tutorial… I tried to explain my general process of working here, hope someone will find it useful :)
Quick CLIP STUDIO PAINT trick
If you’re like me, then you guys love shading your sketches or lineart. Like this:

But if you erase a bit and shade more with black on low opacity it’ll look all wonky so you use the color picker. Or hell you scan or take a photo of a drawing you made on paper. But then this happens if you wanna put color under it!

Oh no! Now I have to set it to multiply to color it in! And then I can’t color in the lineart! :(
Fret not, my dear friends! I found the solution! Go to [Edit] > [Convert brightness to opacity]

And suddenly you have this:

This way you don’t need to set the lineart to multiply and can color it in! It also works perfectly, if you use this nifty little trick on traditional drawings that you scanned.
I hope this helped you guys, because I sure as hell didn’t know about this until yesterday! ♥
Space Brush
Just a quick brush / texture I put together to learn how to make Sai brushes.

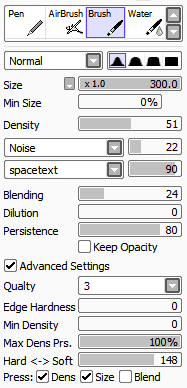
You can get the space texture here. SET THE BRUSH LAYER ON LUMINOSITY.

Please, like or reblog if you download it
Cecilia Script - Hello stockholm - Livewell - Pirmokas - Chunkfive ex - Solmet brush
-
 wolfsrahne28 liked this · 9 months ago
 -
 yaminerua liked this · 1 year ago
 -
 thedorkmark liked this · 1 year ago
 -
 aceysartgallery liked this · 1 year ago
 -
 izumi-yami liked this · 2 years ago
 -
 lofi-and-chill72 liked this · 2 years ago
 -
 collapsiblebrain reblogged this · 3 years ago
 -
 tutoriarts reblogged this · 3 years ago
 -
 chewtoyfrank liked this · 3 years ago
 -
 thatsthenorthstar liked this · 3 years ago
 -
 maraarcanum reblogged this · 3 years ago
 -
maraarcanum liked this · 3 years ago
-
 sandymichellenyc liked this · 3 years ago
 -
 seraphstarss liked this · 3 years ago
 -
 oneglow liked this · 3 years ago
 -
 abandonedabyss liked this · 3 years ago
 -
 goferbrain reblogged this · 3 years ago
 -
 meowsod liked this · 3 years ago
 -
 lavendererose liked this · 4 years ago
 -
 lulusrefblog reblogged this · 4 years ago
 -
 loveallcute liked this · 4 years ago
NSFW because there will probably be nude refs | this is a side blog to sort all of the art stuff I need | none of it is mine
151 posts