FACES
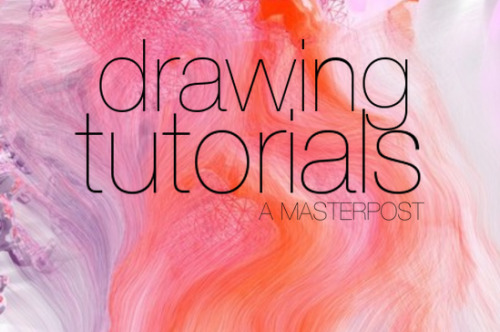
FACES
Drawing a face (the circle thing)
How to draw faces
Heads in profile
Drawing heads
A face tutorial
Avoid same facing
Diversify your faces
Face shapes
To make your drawing look like the person you’re drawing
Make your faces look like the person
Expressions
More about expressions
Drawing lips
Lip tutorial
Drawing ears
Drawing eyes
Realistic eyes
Drawing a nose
Drawing kisses
Drawing glasses
Drawing hoods
BODIES
Guide to human types part 1
Guide to human types part 2
Guide to human types part 3
Different kinds of athletic body types
Ladies tutorial (nudity)
Fellas tutorial
Curves on girls tutorial
How to draw necks
Drawing shoulders
Drawing arms
Drawing hands
Hand tips
More hands
Hands tips and techniques
Hands, arms, legs and feet
Legs, torso and expressions
Drawing boobs
How to boob
Boobs and hips
Drawing abs
Beer belly tutorial
Drawing backs
How to draw back views
Legs reference
Drawing knees
How to draw butts
Penis tutorial (nsfw)
Drawing feet and shoes
Sitting reference
Realistic woman body shape chart
Hair
Drawing hair
Hair tutorial
Drawing curls
Drawing braids
ANIMALS & CREATURES
Canines vs felines
Drawing cats
Drawing cats tips
How to draw big cats
Drawing rats
Basic deer tutorial
Deer sketching
Dog anatomy
Dog anatomy tutorial
Dog nose tutorial
Dog paw tutorial
Basic wolf tutorial
Horse tutorial
Sheep vs goats
Drawing giraffes
Basic owl tutorial
Bird wing tutorial
Drawing bird beaks and faces
Butterfly tutorial
Drawing animal legs on humans
Winged people anatomy
Dragon tutorial
Drawing dragons
Dragon wing tutorial
Fur tutorial
Drawing sharp teeth
OTHERS
Drawing clothes
Clothing folds tutorial
Collars, vests and pants reference
Hats reference
Drawing jeans
Drawing bows
Drawing trees
Tree tutorial
Drawing water
Water tutorial
Drawing crystals
Ice
Clouds
Creating form
Perspective tricks
Character design reference
How to draw better (video)
Learn how to draw better
Art reference & tutorials blog
Tutorial masterpost
How to draw anything
More Posts from 00ff00dreams and Others
Upsizing clothes! There are a million upcycling tutorials for clothes that are too big, but so few on how to make too small clothes you still love bigger!
Thank you for your suggestion! We all go through weight fluctuations in life, so it stands to reason our clothes should be able to fluctuate with us.
Resizing your clothes used to be a very common practice before the advent of fast fashion. Fast fashion sizing is extremely flawed, especially when it comes to plus size fashion, and we're stuck with a lot of vanity sizing, so it's a good skill to have regardless of whether you're looking to mend something old or buy something new.
How to upsize clothes:
Introduction:
There are many different ways to make a garment larger. The following list is not exhaustive, just a few ideas to get you started.
Grading patterns:
If you're making your own clothes, it's always useful to know how to modify a sewing pattern. The easiest way to adjust a pre-existing pattern to your size is slash and spread grading. First, you need to define which spots on the pattern need extra space. You then cut your pattern in that spot, and slide the resulting pattern pieces away from each other until you've got the size you need. Use paper to fill in the gaps. To ensure the resulting pattern makes for well-fitting clothes, make a mock-up and add, move, or remove darts where necessary to adapt it to your body type.
The image below shows potential slashing lines on a set of standard pattern blocks. Each line is a spot that allows you to add extra space. To read more about this process, check out the corresponding article by Threads Magazine.

(Image source) [ID: a diagram of slashing lines on a pattern block for a dress, bodice, skirt, sleeve, and a pair of pants.]
To make your clothes easier to let out in the future, make sure to provide ample seam allowance when cutting out your pattern pieces. This surplus fabric has several different uses, including giving you some wiggle room for when you need to size up your garment.
Now, let's take a look at pre-made garments.
Lengthening clothes:
A garment that's too short on you is easy to modify. Just add more material!
If it's a skirt or a dress, add ruffles to the bottom. Ruffles are easy to make by hand or with a sewing machine. You could also add lace, or wear the item with an underskirt.
For pants, let down your hem or sew on a new cuff. If this isn't enough, maybe consider turning your trousers into capri pants or shorts.
As for shirts, sewing an extra layer to the bottom edge is the easiest way to go, too. You could even combine two shirts into one to get an extra long shirt.
Another option is to cut your item in two and insert extra fabric between your separated garment parts.

(Image source) [ID: a pair of blue pants with cuffs sewn onto the bottom of the legs to lengthen them. The cuffs are made out of a fabric with a blue and brown geometric print.]

(Image source) [ID: a before and after picture of a red t-shirt that was lenghtened by adding in a patch of colourful fabric at the waist.]
Letting out seams/darts:
Remember how we made sure to have ample seam allowance earlier? When a garment has surplus fabric in the seams and you only need a little extra space, you can undo the seams of your garment and sew them back together again, this time with a smaller seam allowance than before. The Spruce Crafts has a pretty good tutorial on how to let out seams. You won't be able to make major size changes using this technique, but if you only need a few centimetres, this is a good way to go.
A lot of garments also have darts. Darts are fabric folds that are sewn down in strategic places to help the fabric follow the body's curves. If a dart doesn't fit you the way you want it to, then unpick the dart and try on the garment. Either leave the dart open, or pin the dart in place however you want it, then take off the garment again and sew the dart back together.
Be careful not to rip the fabric when using a seam ripper. Also note that removing entire darts may change the garment's fit.
You can also add custom darts to achieve a better fit, but that's a topic for another time.

(Image source) [ID: twelve different types of darts on a feminine bodice block.]
Adding extra fabric to your garment:
If we need to add more room than seam allowance or darts can provide us with, we need to add extra material. Remember those slashing lines we looked at earlier? If you're working with a pre-existing garment rather than a pattern, those are the perfect places to chop up your clothes and add in extra fabric.
Check your sewing stash for fabric that's similar in weight and material to your original garment, or go thrift shopping for an item you could use to upsize your garment. Long skirts and maxi dresses are a great source of fabric for alterations like these!
Lace inserts are also a fun choice to add some room, and if you're working with a knit item, you could even knit or crochet your own custom insert.
Define the area where you want to add extra fabric on your item, and measure how much you need. Draw a straight line on your garment with chalk/soap. Make sure the line doesn't cross any important structural or functional parts of your garment like darts or button holes: refer to the slashing diagram we saw earlier if you're not sure what spot to pick. Cut the line open (or unpick the seam if it's situated on a seam), and add in your extra fabric. Finish off your new seams so they don't unravel later on, and you're done!
You can add straight strips of fabric for extra width or length, or you could use flared panels or even godets to make your item flair out.
Want to see this technique in action? Check out this video by Break n Remake:
Some ideas:
This Pinterest user cut a straight line down the front of a t-shirt and inserted a lace panel to add extra width in the front of the garment.

(Image source) [ID: a blue t-shirt with a panel of dark blue lace added in at the centre front.]
Busy Geemaw cut open the side seams of a shirt and used flared panels to add some extra width in the bust and hip area.

(Image source) [ID: a green and white long-sleeved shirt with a striped flared panel in matching colours inserted at the side seam.]
This person added a panel to the sides of a pair of jeans to give them more space in the hip area. You could easily use a long straight panel or a panel that flares at the bottom to resize the entire garment instead of just the hips, or use a wide piece of elastic for extra stretch.

(Image source) [ID: a side view of a pair of light blue jeans with a dark blue wedge-shaped denim insert running down from the waist and ending above the knee.]
This person added a godet in the back of their shirt in order to get more space in the back.

(Image source) [ID: a blue and white plaid shirt with a white lace godet inserted in the back.]
Blue Corduroy enlarged a pair of shorts by opening up the side seams and adding in strips of fabric.

(Image source) [ID: blue denim shorts with a floral fabric insert at the side seams.]
You don't need to resize the entire garment if you don't want to. For example, One Brown Mom turned this ankle-length skirt with a too small waistband into a well-fitting knee-length skirt by taking advantage of the skirt's flared shape.

(Image source) [ID: a woman wearing a black shirt and a brown tartan knee-length skirt.]
Conclusion:
Throughout our lives, our weight will fluctuate and our bodies will change. There's no shame in this: it's just a fact of life. Therefore, knowing how to upsize an item that is too small for you is a useful skill to learn.
If you want more inspiration, check out these projects by Confessions of a Refashionista, One Brown Mom, and Thriftanista in the City.

“Because distillation removes protein if good manufacturing practices are followed, and because it is possible to verify the absence of protein or protein fragments in these products using scientifically valid analytical methods, TTB will permit “gluten-free” claims on distilled products from gluten-containing grains as long as good manufacturing practices are followed to prevent the introduction of any gluten-containing material into the final product,” according to the TTB.
The online Japanese course that no one talks about
Okay so I’m not a langblr and I never plan to be. However. What I do know from following a ton of them is that no one talks about Minato.
Now you may be thinking, ‘What’s Minato?’. It’s a website that was recommended to me by a Japanese Studies university professor for learning Japanse at home.
It’s literally the best resource out there and it’s free (funded by the Japanese government). You can choose between self-study and tutor support-led courses.
There are courses in Hiragana, Katakana, and the general language (from levels A1 to A2), and you can download a certificate and study record after completion of a course.
Here’s the link. Or if you want to type it: https://minato-jf.jp
Go. Learn some actual Japanese.
free rpgmaker and/or browser games you should play:
beetle ninja
astrid & the witch
no one has to die
loved (misgendering tw at the very beginning though, also. abuse tw. emotional abuse specifically and i think gaslighting but it’s been a while since i’ve played it so idr)
six cats under (i haven’t played this yet but it looks sooo cute)
the exact moment
the grey rainbow
Treat anything on Discord as media that will be lost
Do not use Discord to host your files. Do not rely on Discord to preserve your text. DO NOT RELY ON DISCORD FOR ANY KIND OF PRESERVATION OR HOSTING!!
It CAN be lost, it WILL be lost! You must consider Discord as a part of the Core Internet, controlled by one company that hosts the servers.
I thought it was impressive at first that it replaced IRC, but now I am horrified. If the company behind Discord went under today, how many friends would you lose?
How many relationships? How much writing?
You may think this won't happen, but I remember when AIM went down and along with it, entire novels worth of interaction with my oldest friend.
IT CAN HAPPEN TO YOU. IT WILL HAPPEN AGAIN. NO COMPANY IS INFALLIBLE.
Back up your files! Download anything you've saved to Discord NOW, before the API changes go into effect! And DO NOT RELY ON THEM FOR HOLDING IMPORTANT FILES!


Well, cat's out of the bag.
For the past few months (and by that I mean I made 90% of this game in two weeks then stalled with the ending for several months) I've been making a short visual novel game called Labyrinthian. If you like grungy black-and-white hallways, paths that only go forward, and indie games that won't take more than 10 minutes of time, this game is for you.
You can play it on itch.io for a minimum of free! Link here:
https://circuitbird.itch.io/labyrinthian
Yoooooo!!!!


-
 w-starshine liked this · 2 weeks ago
 -
 spec1f1c0cean reblogged this · 3 weeks ago
 -
 gravitylock liked this · 3 weeks ago
 -
 the-awesomeness-of-randomness liked this · 1 month ago
 -
 boudicca-of-iceni liked this · 1 month ago
 -
 donkeykongclassifiedsecrets reblogged this · 1 month ago
 -
 beatsthingies liked this · 1 month ago
 -
 planetamarte reblogged this · 1 month ago
 -
 00ff00dreams reblogged this · 1 month ago
 -
 sapphicchako liked this · 1 month ago
 -
 miss-shell20 liked this · 1 month ago
 -
 prism-tears liked this · 1 month ago
 -
 ratxxxpasta liked this · 1 month ago
 -
 silent-hound liked this · 1 month ago
 -
 x-kaitlyn-x reblogged this · 1 month ago
 -
 raspberrycrown-bitch reblogged this · 2 months ago
 -
 shirestrawberry144 liked this · 2 months ago
 -
 flowermance liked this · 2 months ago
 -
 furfox liked this · 2 months ago
 -
 watermelonduchess liked this · 2 months ago
 -
 aliceunderlines liked this · 2 months ago
 -
 queencantaloupe reblogged this · 2 months ago
 -
queencantaloupe liked this · 2 months ago
-
 thiago0021 liked this · 2 months ago
 -
 natterss reblogged this · 3 months ago
 -
 smbdymiau reblogged this · 3 months ago
 -
smbdymiau liked this · 3 months ago
-
 haunteddeerearthquake reblogged this · 3 months ago
 -
haunteddeerearthquake liked this · 3 months ago
-
 bambamboozles liked this · 3 months ago
 -
 crabanaut liked this · 3 months ago
 -
 yute15 liked this · 3 months ago
 -
 sweettoothbadger liked this · 3 months ago
 -
 duck-with-scissors liked this · 3 months ago
 -
 miguelofasshai reblogged this · 3 months ago
 -
miguelofasshai liked this · 3 months ago
-
 henrytanael19 liked this · 3 months ago
 -
 sleepabyss liked this · 3 months ago
 -
 archtech-fox reblogged this · 3 months ago
 -
archtech-fox liked this · 3 months ago
-
 that-shy-fanfic-writer reblogged this · 3 months ago
 -
 starryknight565 reblogged this · 3 months ago
 -
starryknight565 liked this · 3 months ago
-
 ironwolf-gone reblogged this · 3 months ago
 -
 lemondropsandstars reblogged this · 3 months ago
 -
lemondropsandstars liked this · 3 months ago
-
 techtainia reblogged this · 3 months ago
 -
techtainia liked this · 3 months ago
-
 let-them-eat-c4k3 reblogged this · 3 months ago

blog created as an archive of posts i would want to save for various reasons
154 posts