Some Of My Favorite Vintage Dresses ↳ Green
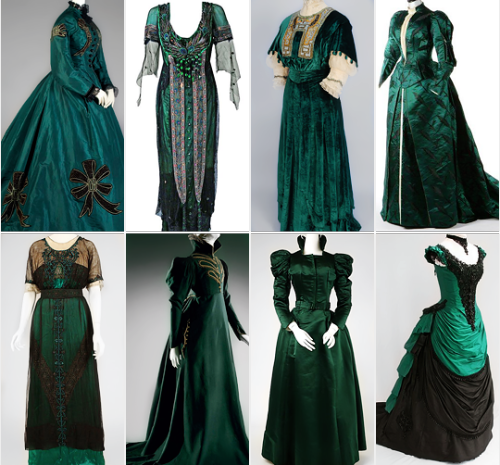
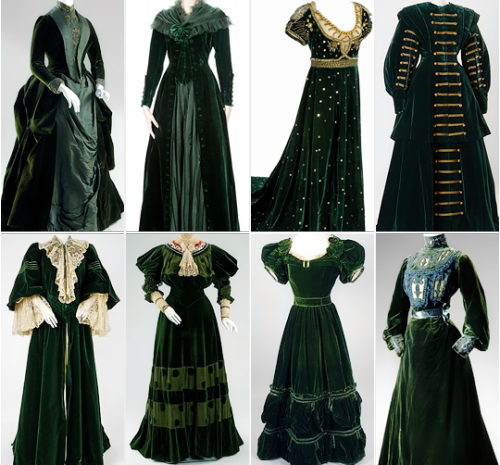
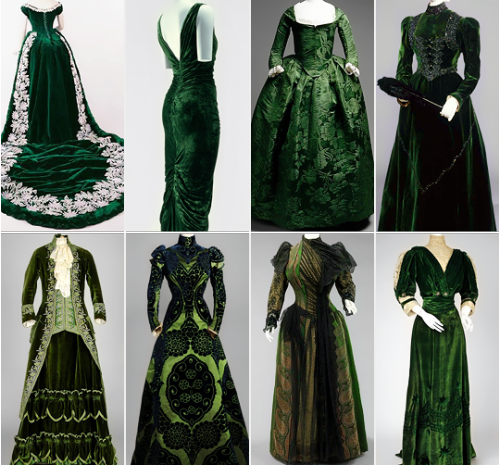
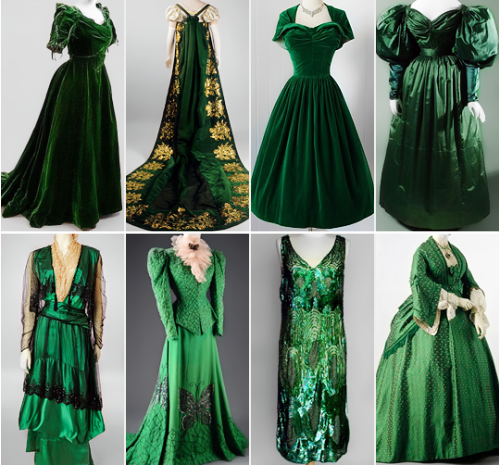
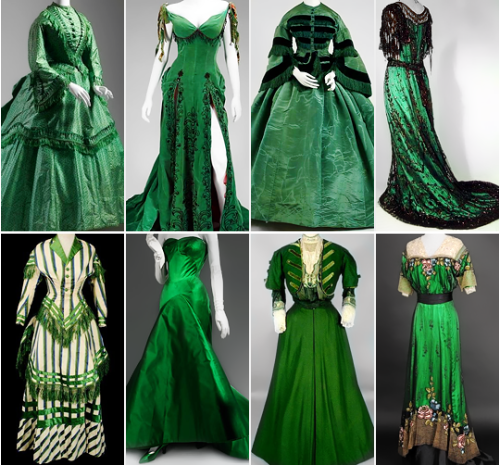
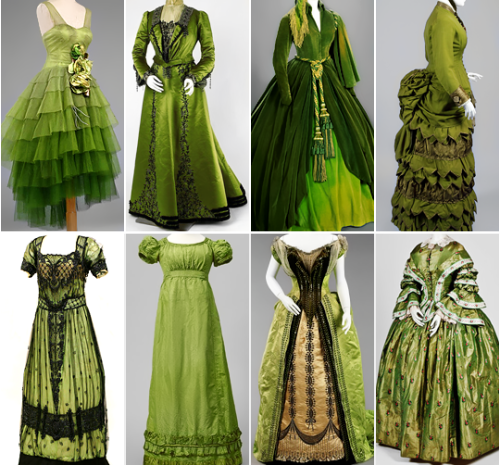
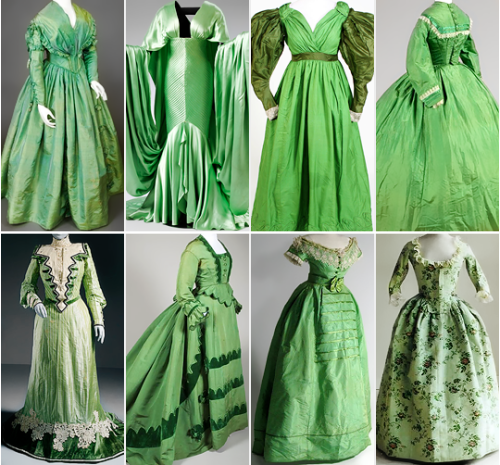
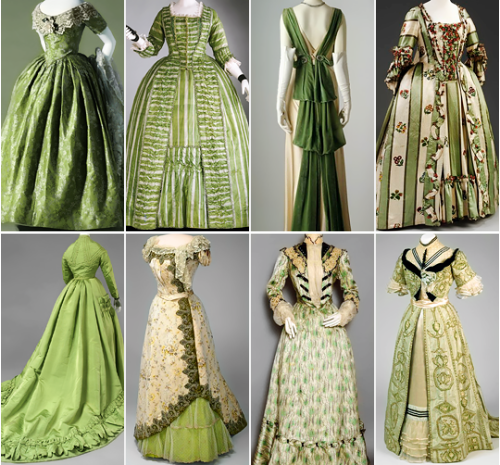
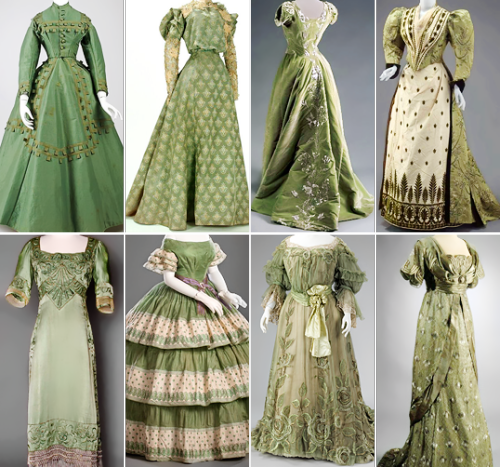
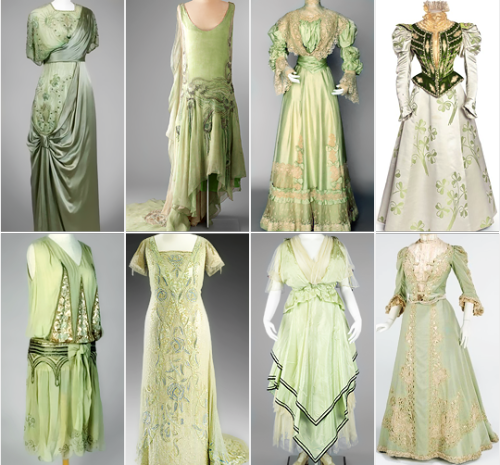
some of my favorite vintage dresses ↳ green
More Posts from Zelo-ref and Others

Just wanted to quickly share this great website with fellow writers and roleplayers, because it’s where I find names 100% of the time, hashtag blessed.
Essentially, the homepage has a box you can type a name you like into, then you’ll be presented with lists of male, female and unisex names related it by user votes and a google-like “also searched for…” feature. There are three ways to use this website.
01: RANDOMLY. You don’t have to type a name to begin, you can just click one and keep going until you’re satisfied. 02: BY VIBE. Writing a stereotypical high school cheerleader who feels like a Claire, but isn’t? Search Claire and you’ll get tons of names with a similar feel. This also works with time period names. 03. BY ETHNICITY / NATIONALITY. In my screenshot, you can see I was searching for a name for Avan Jogia. I don’t know about you, but I think their very first suggestion of Ketan is perfect. This can help you make sure you aren’t entirely white washing names for a lack of options on most name lists.
Additionally, you can click the lines beside a name to add it to your favorites list (stored with cookies), so you can organize all your options as you go. Have fun!


Hello! I'm a self taught artist who wants to get better at shading/lighting and backgrounds especially. But whenever I try to do a background study, I can't break it down and it ends up looking terrible. Do you know of anything that would help?

Hi! I would like to talk a little bit of the thought process behind photo study and the importance of simplicity.

It is really important to break down an image to chunks of value rather than seeing the detail first, which can lead to over-complicated mush of colors with no constructed value.
These are some of the artists that inspired me to get used to breaking down images in the most simplest way possible:

Notice how super simple and straight-on-point his thumbs are? And this is how his colorscript for Moana looks like:


Zero detail. Yet you have all the information you need!
I personally think these thumb studies are super important to train your eyes to break down an image in values and colors and therefore be able to organize and design your painting better.


Basically I just shade with a very dark color, and apply a small gradient of some bright saturated color along the borders to emulate diffused light.

Varying light angles and intensity for mood! I love back light HAHAHa–
Can work it in other hues, too! And I guess here’s a quick walk through of smth similar to that pic you were talkin about, with windows of strong light.

Draw the projected light over the subject

Add shadows on the character. Moved the light going past the character hitting the floor.

Overlay the bleeding light!
I use a lot of this kinda thing in finished pics too– here’s a recent example!

(This image was a collaboration– Sketched by labonbull and linearted by 73oss)


Really usefull
I'm kinda ashamed to ask this, but could you make a tutorial on how to draw hands? ;A;
omg dont be ashamed at all!! Hands are generally tough to get used to, lots of artists struggle with it! so dont be ashamed i feel you.
and I actually have made a hand anatomy guide before in fact! If you want to get better at drawing hands I def recommend you learn the basic anatomy first. Please check out the ones I made, I try to make it simple and easy to understand:
Artistic Anatomy: Hands Part 1
Artistic Anatomy: Hands Part 2
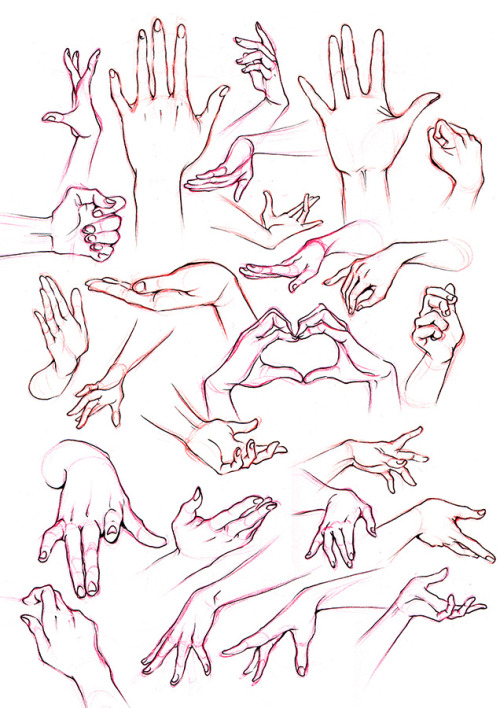
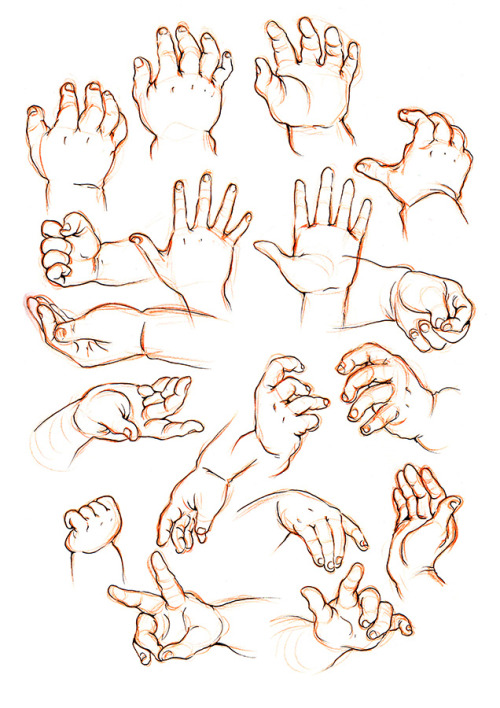
There’s my guide to the anatomy, but here’s some more tips that I’ve noted to myself that I’d like to include
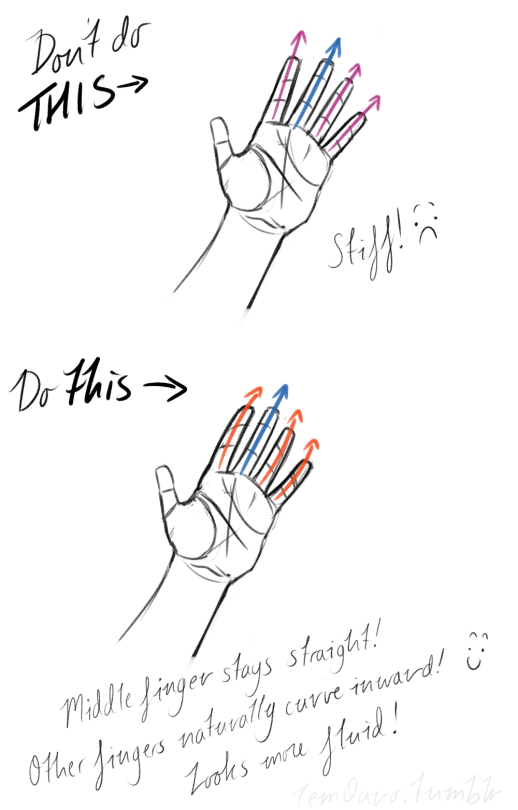
First off, I’d like to just note on the fingers: if you pay close attention to your own hand, you may notice the fingers are ever ever so slightly curved inward. It’s a very subtle detail, but I noticed that, despite how slight it is, it can make a hand look more lively, and less stiff.
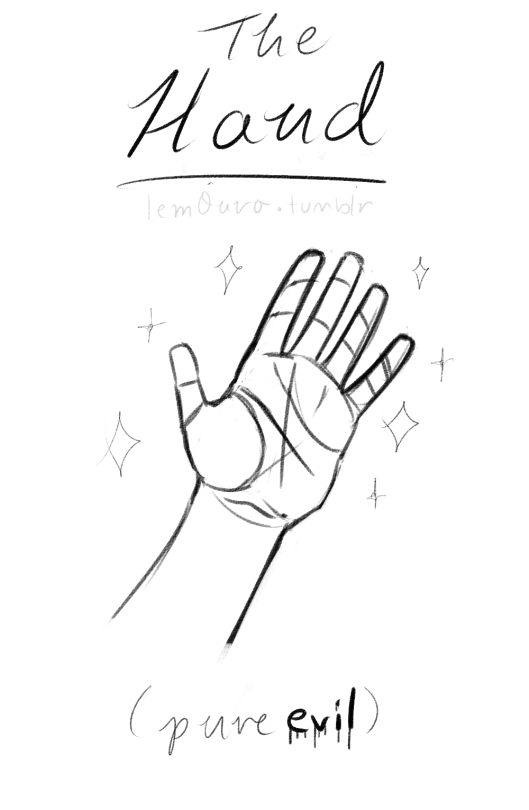
Second, the “M” on the palm! Your hand moves in many ways, and because it does it creates creases in your hand. The most prominent creases appear to make an M shape; this is handy to remember for what I’m going to talk about next. (It also could be a “W” I guess, or to be more specific a “ )X( “; just think of it in whatever way helps you remember!)

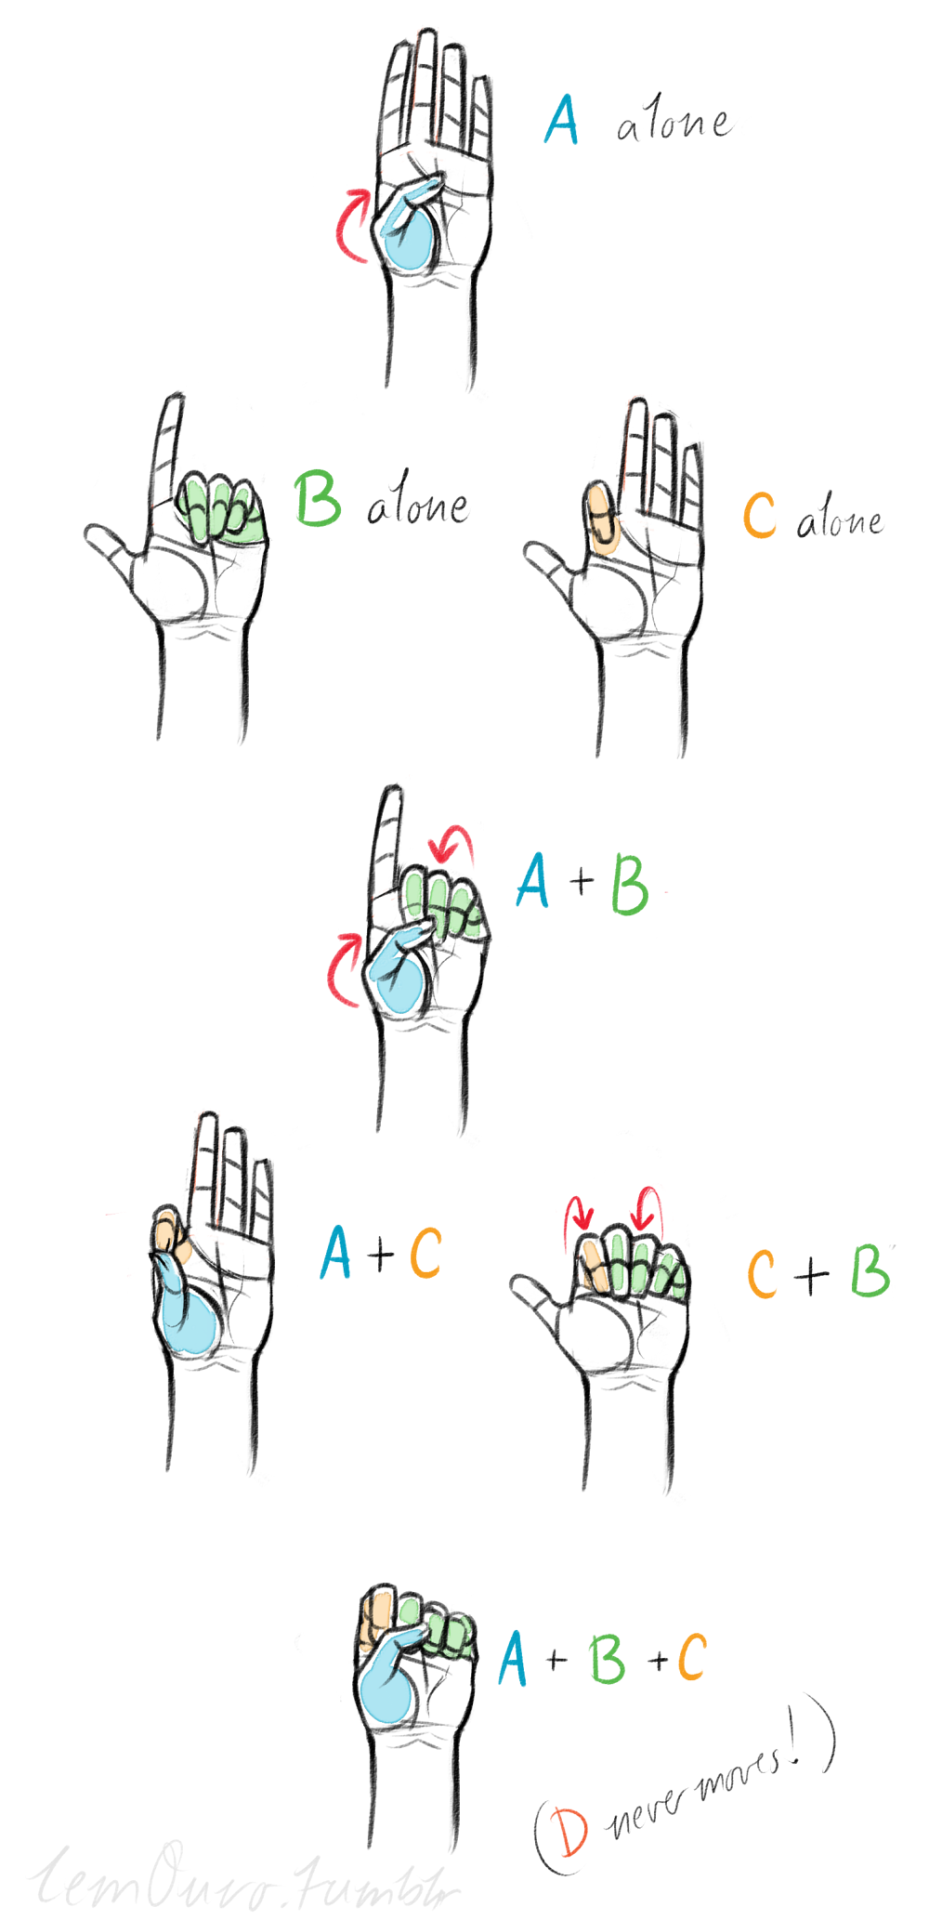
SO now that you see the M, draw your hand as a basic blocked shape and add your details. As you do, you can see that the M divides the palm into four basic parts!


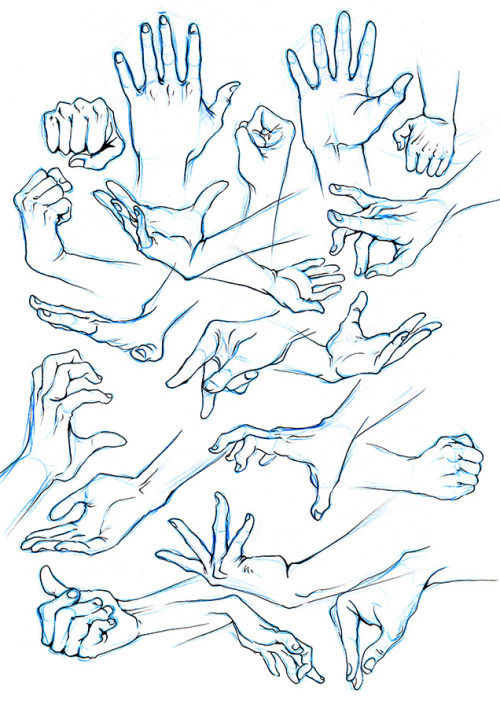
When the hand moves, parts A, B, or C of the palm, alone or in different combos, will create the general poses that the hands do normally. These parts are the parts that move, with D being stationary, no matter what!
Here’s a chart of all the possible combos. Once you have down what part of the hand moves for a certain pose, you can change up the fingers and tweak it a bit to do what you need to make it more specific!
This is simply my method of drawing hands. God knows there are hundreds of tutorials out there by other artists, but personally, this way helps me the best (after learning the anatomy first).
This way I can divide the hand and combine the parts in any such way I need!
Hands take a lot of effort to grapple, and you need to practice them a lot, especially foreshortening of the hand; that’s really something you need to learn through your own studies. Look at your own hands, draw hands from life, from magazines, shows, comics; just draw hands! You’ll eventually figure out a method that works best for you. So to get better at drawing hands; draw hands!! And don’t stress over it, have fun with it!


Sketches that came with the Magi DVD vol.7 that depict the main three going on a journey. Here’s Ohtaka’s comment:
“These are sketches that I did before the serialization. I drew them while looking at pictures of the Mogao Caves in China. At first, Magi was going to be a manga that revolves more around conquering dungeons, and so I did a lot of sketches like these.”
-
 reacquaintedwith-air liked this · 2 weeks ago
 -
 naturelaughslast reblogged this · 2 weeks ago
 -
 violet-frog liked this · 2 weeks ago
 -
 thesyntheticflyingmachine reblogged this · 2 weeks ago
 -
 floorgoblin reblogged this · 2 weeks ago
 -
floorgoblin liked this · 2 weeks ago
-
 assessthatdress reblogged this · 2 weeks ago
 -
 ace-memelord liked this · 2 weeks ago
 -
 infinemmonstrum liked this · 2 weeks ago
 -
 loov1 liked this · 1 month ago
 -
 coolclothestorefrence reblogged this · 1 month ago
 -
 gildedamnesiac reblogged this · 3 months ago
 -
gildedamnesiac liked this · 3 months ago
-
 camembertunicorn reblogged this · 3 months ago
 -
 worldbuildingandothernonsense reblogged this · 5 months ago
 -
 wendersfive liked this · 6 months ago
 -
 thenebulousthey reblogged this · 6 months ago
 -
 bringthesauerkraut liked this · 7 months ago
 -
 bubblesss381 reblogged this · 8 months ago
 -
bubblesss381 liked this · 8 months ago
-
 palaemonfire reblogged this · 8 months ago
 -
 bbeeohazardd liked this · 8 months ago
 -
 beautifulfashionfantasy reblogged this · 9 months ago
 -
beautifulfashionfantasy liked this · 9 months ago
-
 waffles-waffles-co liked this · 9 months ago
 -
 toxictaicho liked this · 9 months ago
 -
 bookaddict123 reblogged this · 10 months ago
 -
 ichabod-katrina reblogged this · 11 months ago
 -
ichabod-katrina liked this · 11 months ago
-
 hitokoyaki liked this · 11 months ago
 -
 minidomi101 reblogged this · 1 year ago
 -
minidomi101 liked this · 1 year ago
-
 pocketstitched reblogged this · 1 year ago
 -
 pseudofangirl liked this · 1 year ago
 -
 salty-witch liked this · 1 year ago
 -
 piratekingpitchblack liked this · 1 year ago
 -
 not-meant-to-be-a-mistake liked this · 1 year ago
 -
 noimtheonewhosdoomed reblogged this · 1 year ago
 -
 witchescorner76 liked this · 1 year ago
 -
 soupwithnospoon liked this · 1 year ago
 -
 singingatbabies reblogged this · 1 year ago
 -
 the-spice-must-woah reblogged this · 1 year ago
 -
the-spice-must-woah liked this · 1 year ago
-
 bluestockingbaby liked this · 1 year ago
 -
 thefoolishhope liked this · 1 year ago
 -
 agreyeyedgirl reblogged this · 1 year ago
 -
 randomgallium liked this · 1 year ago
 -
 nicolaspicolas reblogged this · 1 year ago