Evening Doodle

evening doodle
More Posts from Zelo-ref and Others


resource for procrastination
if you’re anything like me, working on a computer is a dangerous thing. i’ll get distracted by everything - that one email i should respond to, all the pictures of my dog, tumblr, and so on. I recently discovered an amazing resource to stop that.
it’s called writer’s block, and is free to download!
when you open it, it shows this screen, where you can choose either a time limit or word goal

then when you start, it opens a document that fills the entire screen like this

and you cannot quit the app or open anything else until your word/time quota is filled. i just wrote half of my english speech that i’ve been putting off all morning, and it took only 20 minutes!
so yup, it’s called writer’s block and is free for both mac and windows. enjoy!

Viking/ Slavic Archer
via Mario Suze on Flickr


How To Shade
a quick tutorial on shading (with graphite) by yours truly. this is the process I use for shading, and there are tons more out there if this one doesn’t work for you.
MATERIALS USED

1 HB graphite pencil
1 2B graphite pencil
1 4B graphite pencil
1 blending stub (the bigger the better)
1 plastic eraser (white)
1 kneaded eraser (grey)
now why do I use two erasers? well, they’re very different from one another, and each serves their own purpose.
the plastic eraser is harder, and when it erases, it erases everything. the kneaded eraser is soft, and it doesn’t completely erase everything all at once. you can use it to pick up some of the graphite and leave some behind, lightening (but not totally erasing) your shading. plus, the kneaded eraser is so soft you can mold it, and it doesn’t leave pencil shavings. if one end gets too used, you can just stretch it out, and it’s as good as new.
REFERENCE USED

now lets get this started, shall we?
STEP ONE
scribble lightly over your drawing with either an HB (aka a regular #2 pencil) or 2B pencil. you don’t have to be extremely neat, but do it light and nice enough so it can still be erased/you can still see the original lines underneath.

STEP TWO
take your blending stub (the wider the better, and if you don’t have one, use a tissue) and rub in the opposite direction of the scribbling. don’t press too hard, because it might streak/not work if you do.


STEP THREE
erase the extra shading around the edges (using the plastic eraser.).

STEP FOUR
roughly add your darks

STEP FIVE
roughly add your lights by erasing with the kneaded eraser

STEP SIX
add your finishing touches (secondary shadows, background, etc)

(I reshaped the sides, added more lights, and added the background shadow)
and voila! you just did some shading!
8 Wedding Veil Styles
1. Angle
The Angle is a type of wedding veil that can be worn to the side of the head giving you a slight angle to the front (or to the back of the crown). This particular example features soft illusion netting and is finished with bobby pin loops for easy addition to a fascinator (fascinator example shown in photo below, right).

2. Bavolet
A Bavolet veil has a blusher veil on the front with a back snood style (snood refers to a type of garment worn at the back of a woman’s head). These two types of veils – the blusher and the snood – are sewn together to create one veil. In this particular example, the front veil can be flipped for the reception to provide another look.

3. Blusher
A blusher veil is very versatile and can be worn on the side of the head, back of the head, or flipped for a snooded look at the reception.

4. Elbow Length
This next style offers a dramatic look with fullness. An elbow length veil traditionally hits at your elbow and this particular example measures 32″ in length; it also features a corded edge. Elbow length wedding veils can be one-tiered (as shown) or two-tiered for additional fullness.

5. Fingertip Length
The fingertip length veil is a traditional choice and, as shown below, can be made in a two-tiered style for added volume. The second tier can be used as a blusher when you walk down the aisle, which can be then worn back during the reception. As the name suggests, this veil measures approximately to the length of your fingertips.

6. Cap
The cap refers to the portion of the veil that sits atop the head and frames the face. This particular example, for instance, uses ribbon to create a capped look that is simply timeless.

7. Mantilla
A mantilla veil is one that is lined with a wide edging of lace. This example below uses Alencon lace to frame your face beautifully.

8. Cathedral
The Cathedral veil makes a statement with its floor-length elegance. This veil can measure between lengths of 6 feet, 7 feet, 8 feet, or even 9 feet.

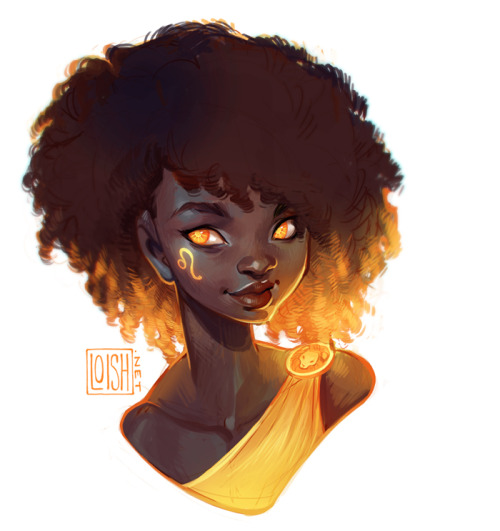
another commission drawn for one of the backers of my (now closed) artbook kickstarter campaign! this one’s for Talia, who wanted a character with lots of references to the leo zodiac sign.
why you should make a webcomic and why you can make a webcomic
why should you make a webcomic?
it’s regular drawing practice
you get to draw and develop the universe your OCs live in
you could draw your OCs making out with context
see number 3
how can you make a webcomic?
make a new tumblr
install this theme https://www.tumblr.com/theme/37061
post comics as you would on any other tumblr they show up on their own webcomic site
what if nobody sees my webcomic :(
too bad you got to draw your OCs making out and nobody can appreciate your artistic genius obviously the world is not ready for this webcomic genius


-
 foxyfudgecake reblogged this · 7 years ago
 -
foxyfudgecake liked this · 7 years ago
-
 whateverforver5-blog liked this · 7 years ago
 -
 chang-tong liked this · 8 years ago
 -
 magicaltunes liked this · 8 years ago
 -
 kadoinu liked this · 8 years ago
 -
 washiwashi-leonard liked this · 8 years ago
 -
 guesswho25 reblogged this · 9 years ago
 -
 megustasermala reblogged this · 9 years ago
 -
 grnfallenangie reblogged this · 9 years ago
 -
 psydrate liked this · 9 years ago
 -
 cramschoolcorp liked this · 9 years ago
 -
 wickedspeak liked this · 9 years ago
 -
 sweetea97 liked this · 9 years ago
 -
 m0fu liked this · 9 years ago
 -
 dameracrystmon liked this · 9 years ago
 -
 harpywitharobot liked this · 9 years ago
 -
 5dsyuseilikeaboss liked this · 9 years ago
 -
 arysamisu liked this · 9 years ago
 -
 stardusthime liked this · 9 years ago
 -
 auti-hottie reblogged this · 9 years ago
 -
auti-hottie liked this · 9 years ago
-
 warpriestessnakuru reblogged this · 9 years ago
 -
 hopewellstudio liked this · 9 years ago
 -
 feyell-blog liked this · 9 years ago
 -
 kuzmich-isterich liked this · 9 years ago
 -
 zelo-ref reblogged this · 9 years ago
 -
 cerato967 liked this · 9 years ago
 -
 astealle liked this · 9 years ago
 -
 terak liked this · 9 years ago
 -
 lapindelapino liked this · 9 years ago
 -
 ln-au-carre liked this · 9 years ago
 -
 love-all-the-things reblogged this · 9 years ago
 -
 onionblaze liked this · 9 years ago
 -
 shofie-irl reblogged this · 9 years ago
 -
 cockiestmageeorzea reblogged this · 9 years ago
 -
 bakakatie liked this · 9 years ago
 -
 kutty-sark liked this · 9 years ago
 -
rook-jattah liked this · 9 years ago
-
 raimunee liked this · 9 years ago
 -
 animetrash135 liked this · 9 years ago
 -
 kazoosh-the-cat liked this · 9 years ago
 -
 quissti liked this · 9 years ago
 -
 cyriesartblog liked this · 9 years ago