Basic Sketching Tips
Basic sketching tips


IG: @mitchleeuwe
More Posts from The-reconing and Others
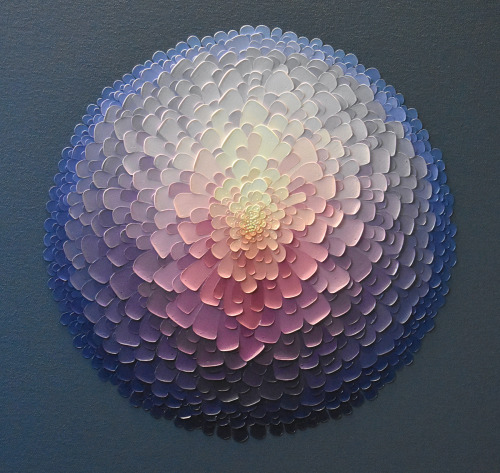


Gradients of Thick Petals by Artist Joshua Davison Are Layered Precisely with a Palette Knife
The Head and The Savior
Keep reading
Hey Goblins, uh
Did you know, that you can make an AWESOME journal for your adventures ALL ON YOUR OWN from a cereal box and paper/scraps that you likely have at home/can get from friends or family/you may find around your environment?
They’re called Junk Journals and they’re my entire life.
Im gonna do my best to walk you through how to make one! First, get you a mini cereal box! I use boxes from those cool multipacks of cereal that you can find at Walmart!

And then cut it out so it looks like this! (I already had one cut, so I’m gonna use that)

That “nutrition facts” side is gone become your spine!
Next, find some paper to use to decorate your cover! I was lucky enough to be gifted a bunch of scrapbooking paper, so I’m gonna use that, but you can also use newspaper, paper from books/magazines, junk mail, napkins, paper towels (excellent texture), etc!

Go ahead and glue that paper to your box (to cover the cereal logo) and cut it out! It’ll look like this;


Next you need to find your pages! Again these can be anything! Junk mail, envelopes, receipts, food wrappers, magazine/book pages, scrapbook paper, computer paper, construction paper, ANYTHING. Just grab a whole bunch!
You’re gonna want to fold them in half and cut them to the size of one of the covers of your box, and layer other pages inside of it to make your signatures, like this!


Each signature should be about 7-10 pages. You don’t want them too thick, otherwise the inner pages start sticking out when folded in half. You’re gonna have a LOT of these signatures, as you wanna fill the area in the spine as best as possible. For this one I’m using 7 page signatures. Here’s a pic to show just how much paper you’ll need

Each of these signatures are 7 pages, 6 signatures have only filled about half of the spine, so I’ll need probably 6 more.
Next you gotta figure out how you want them in your journal. Personally, I like to sew them into the spine, but you can also keep them in the spine with rubber bands, so you can have removable pages! (Be weary that rubber bands may break over time! So you may want to always keep extra bands near it to replace in case one snaps. This is why I prefer sewing them in) I find it best to look up on YouTube how to sew in signatures, just because having someone walk you through it where you can see what they’re doing is easiest. If you can’t access YouTube, there’s plenty of text tutorials on how to sew in signatures online, or you can message me! I’m not gonna go too into detail, but here’s the jist;


Okay so I’m a forgetful gob and I hecken forgot to take pictures as I was going along kahshshshsh
But essentially, I sewed in the pattern similar to the one I drew. The dots are where the needle goes all the way through to the back. I also like to use rubber band as an extra mode of support but you can do one or the other. I also like both cuz I can tuck stuff in em between the pages. Since I didn’t take more pictures; I’d really recommend looking up a how-to on YouTube or w/e if my badly drawn diagram isn’t clear enough (heh sorry about that)
Next, I glue fabric to the spine. It spruces it up quite a lot and holds the rubber bands in place, plus it give more support to the spine since there’s gonna be a lot of strain on it.
Only 10 photos per post, so I gotta post this and reblog it with the rest.
Read more here:


this is mina with starfires powers look how cool and awesome she is
this is one of my first art work so please reblog this and if you guys have any request i will try to best to make them
Hey, could you tell me how you make linart a different color without having to erase and redraw? I've seen it happen on a couple speed paints and on some of your sketches but no idea how to do it myself
(this is a wip sketch i have) |(this is also the art progam SAI)

1. have your original layer(i usually use red for my sketches)

2. create a new layer

3. click the Clipping Group tab, a red line will appear next to the layer this is applied to

4. then just add whatever color your changing your sketches/lineart to and voila! as simple as that! i hope this lil thrown together tutorial helps!
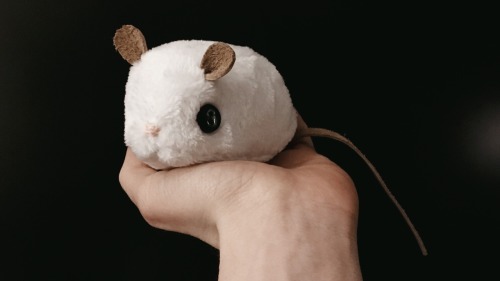

I was having writers block and so I took a break and soon enough it was 3 in the morning and I had impulsively sewn together a tiny mouse you’re welcome

Starfall~ I recently got a BlueSky account for those who also wanna follow me there :) https://bsky.app/profile/yuumeiart.bsky.social
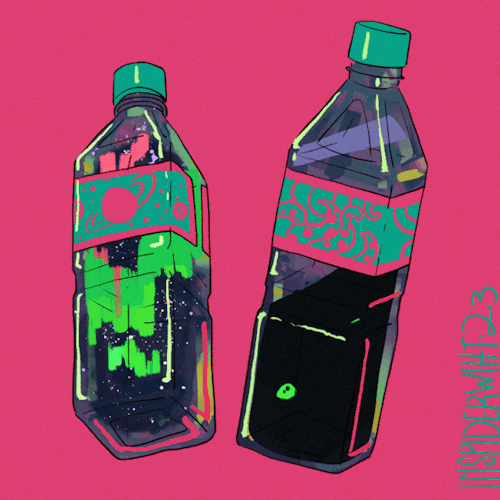
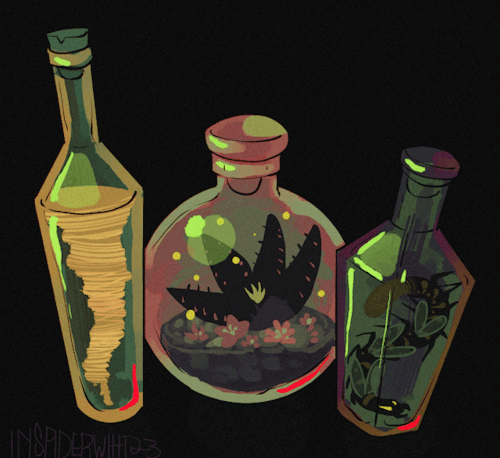
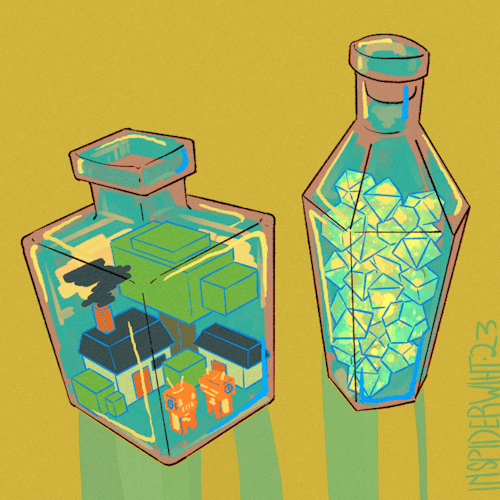
bottling some more assorted things for patreon last month


Go ahead, try and convince me that canon Bakugou wouldn’t pull this shit.
-
 sleepyorchidmonster liked this · 2 weeks ago
 -
 peachyfuck18 liked this · 2 weeks ago
 -
 raining-dreams liked this · 3 weeks ago
 -
 tisaquest liked this · 3 weeks ago
 -
 alihellobby24 liked this · 1 month ago
 -
 showlunar liked this · 1 month ago
 -
 archive-of-sorts reblogged this · 1 month ago
 -
 anarchyspider reblogged this · 2 months ago
 -
anarchyspider liked this · 2 months ago
-
 rainycake15 liked this · 2 months ago
 -
 thatfluffymuffin reblogged this · 2 months ago
 -
thatfluffymuffin liked this · 2 months ago
-
 loveasachoice liked this · 2 months ago
 -
 sunsetcolour reblogged this · 2 months ago
 -
sunsetcolour liked this · 2 months ago
-
 infernogoddes9 reblogged this · 2 months ago
 -
infernogoddes9 liked this · 2 months ago
-
 terrasolstice liked this · 2 months ago
 -
 max-the-hecker liked this · 2 months ago
 -
 sketchygainedyoursoul reblogged this · 2 months ago
 -
sketchygainedyoursoul liked this · 2 months ago
-
 kimera20 reblogged this · 2 months ago
 -
kimera20 liked this · 2 months ago
-
 readerov21comics reblogged this · 3 months ago
 -
readerov21comics liked this · 3 months ago
-
 peculiarphantomphoenix reblogged this · 3 months ago
 -
peculiarphantomphoenix liked this · 3 months ago
-
 mcfanely liked this · 3 months ago
 -
 kingryannducks liked this · 3 months ago
 -
 mossy-thing liked this · 3 months ago
 -
 the-best-duck-tamer liked this · 3 months ago
 -
 40redd liked this · 3 months ago
 -
 shinyshade8026 liked this · 3 months ago
 -
 kitten-kokomo liked this · 3 months ago
 -
 echodoesstuff62333 liked this · 3 months ago
 -
 mobius-abyss liked this · 3 months ago
 -
 energylessartist liked this · 3 months ago
 -
 woollyrat liked this · 3 months ago
 -
 thatguywhodoesstuff reblogged this · 3 months ago
 -
thatguywhodoesstuff liked this · 3 months ago
-
 sillyguyposting liked this · 3 months ago
 -
 butter-bizcuit liked this · 3 months ago
 -
 coco-the-cryptid reblogged this · 3 months ago
 -
coco-the-cryptid liked this · 3 months ago
-
 15depressedducks reblogged this · 3 months ago
 -
15depressedducks liked this · 3 months ago
-
 sifishsticks reblogged this · 3 months ago
 -
 steadylandface liked this · 4 months ago
 -
 younamesworld liked this · 4 months ago